How to Remove Ticks From Dogs Safely: A Vet-Aligned Protocol
ProtocolQuick picks
| Product | Key Specs |
|---|---|
| See price on Amazon |
|
| See price on Amazon |
|
| See price on Amazon |
|
Product availability, certifications, and retailer details can change; check the current Amazon page before buying.
The safest way to remove ticks from dogs is to grasp the tick close to the skin with fine-tipped tweezers or a tick tool, then pull straight out with steady pressure. Do not burn, smother, twist, or squeeze it. Clean the bite and monitor your dog afterward.
How We Score This Evidence
| Criterion | Weight | Score | Weighted | Why it matters here |
|---|---|---|---|---|
| Research | 30% | 8.5 | 2.55 | CDC, AVMA, CAPC, and veterinary references align on prompt mechanical tick removal. |
| Evidence Quality | 25% | 8.0 | 2.00 | Removal mechanics are well standardized, while disease risk depends on region, species, and attachment time. |
| Value | 20% | 9.0 | 1.80 | Fine tweezers or a tick tool are inexpensive and useful in any pet first-aid kit. |
| User Signals | 15% | 8.0 | 1.20 | Owners need simple steps because panic-driven folk remedies are common and can worsen removal. |
| Transparency | 10% | 9.0 | 0.90 | This protocol separates safe home removal from symptoms that require veterinary care. |
| Composite Score | 8.5/10 | Strong, practical protocol with clear escalation triggers. |
Before You Start: Confirm It Is a Tick
Slow down for a few seconds before pulling. Dog nipples, skin tags, dark scabs, and small benign growths are often mistaken for ticks. A tick usually has a rounded body attached at one end, may show tiny legs near the skin, and is often found around ears, eyelids, neck, armpits, groin, toes, or under collars.
If the object seems to grow from the skin, bleeds when touched, or has been there for weeks, do not pull. Take a photo and ask your veterinarian. Removing an actual skin growth like a tick can hurt the dog and create an unnecessary wound.
Tools That Make Removal Easier
You do not need a complicated kit, but the right tool helps you avoid crushing the tick. Fine-tipped tweezers work well because they can grip close to the skin. A pet tick-removal hook can also work, especially on larger ticks, as long as you follow the tool directions and avoid squeezing the body.
Useful product searches:
- Search Amazon for fine tip tweezers tick removal dog
- Search Amazon for dog tick removal tool
- Search Amazon for pet first aid antiseptic wipes
- Search Amazon for tick key removal tool pet
The correct tool depends on tick size, grip style, cleanability, and current product availability. Choose a smooth, durable tool that can be cleaned after use.
Step-by-Step Tick Removal Protocol
1. Keep the dog still and comfortable
Have a second person offer treats or hold the dog gently if needed. Use good light. If the tick is near the eye, inside the ear canal, on the lip, or in a painful area where the dog may bite, stop and call your veterinarian. Safety matters more than speed.
2. Part the fur and expose the attachment point
Separate the hair until you can see where the tick enters the skin. Wetting the fur lightly with water can help. Avoid smearing oils or alcohol on the tick. Those methods can irritate the skin and may make the tick harder to grip.
3. Grip close to the skin
Place the tweezer tips around the tick as close to the dog’s skin as possible. The goal is to hold near the mouthparts without pinching the dog’s skin. Do not grab the swollen body if you can avoid it. Crushing the tick can make removal messier and harder to identify.
4. Pull upward with steady pressure
Pull straight out, slowly and steadily. Do not jerk, twist, burn the tick, paint it with nail polish, or cover it with petroleum jelly. The CDC and veterinary guidance consistently recommend mechanical removal with steady traction.
5. Clean the area and your tools
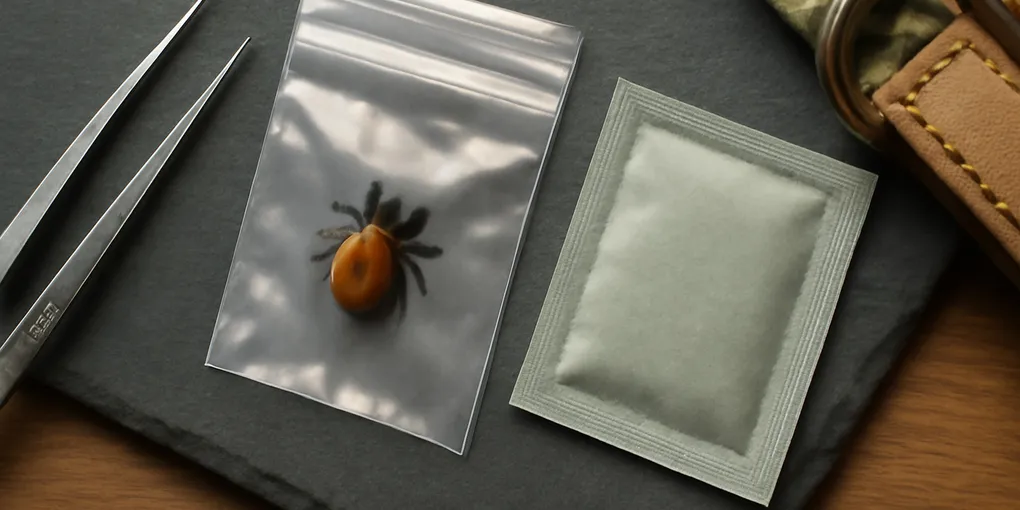
After the tick releases, clean the bite area with a pet-safe antiseptic wipe or mild soap and water. Wash your hands. Clean the tweezers or tick tool. Dispose of the tick in alcohol, a sealed bag, or tape. If you live in a high-risk tick area, save the tick or take a clear photo.
What If the Mouthparts Stay Behind?
A tiny dark speck left in the skin is usually mouthpart material, not a whole tick head. Do not dig deeply with a needle or tweezers. Aggressive digging creates more tissue damage than the fragment itself. Clean the area and monitor. Call your veterinarian if the site becomes increasingly red, swollen, painful, warm, draining, or if your dog seems sick.
Symptoms to Watch For After a Bite
Most tick bites cause a small local bump and nothing more. The reason to monitor is that ticks can transmit diseases such as Lyme disease, anaplasmosis, ehrlichiosis, babesiosis, and Rocky Mountain spotted fever depending on geography and tick species. Symptoms may appear days to weeks later.
Call your veterinarian if you notice fever, lethargy, appetite loss, shifting-leg lameness, joint swelling, enlarged lymph nodes, bruising, nosebleeds, vomiting, diarrhea, or unusual weakness. Bring the tick photo, your travel history, and the date you removed it.
Prevention Matters More Than Perfect Removal
A removed tick is good; a prevented bite is better. Ask your veterinarian which tick preventive fits your dog’s age, weight, health status, region, and household. Some dog tick products are dangerous to cats, especially permethrin-containing products, so multi-pet homes need extra care.
Check your dog after hikes, yard work, beach grass, wooded trails, and travel. Run your hands over the ears, neck, chest, armpits, belly, groin, tail base, and between toes. Ticks can be tiny before feeding, so use your eyes and fingers.
Where to Check After Outdoor Time
Ticks like protected places where fur is dense, skin is thin, or the dog cannot easily scratch. After wooded trails, tall grass, beach dunes, hunting trips, camping, or travel, check the ears inside and out, eyelids, lips, under the collar, armpits, belly, groin, tail base, and between toes. Run your fingers slowly against the coat, then look closely at any bump.
Long-coated dogs need a comb and patience. A slicker brush can find mats, but fingertips often find ticks first because even a tiny attached tick feels like a firm seed stuck to the skin. For dark-coated dogs, use a bright headlamp or phone light. If your dog dislikes handling, pair the check with treats and break it into short sessions.
What Not to Do
Do not touch a hot match to the tick. Do not apply nail polish, petroleum jelly, essential oils, gasoline, or harsh disinfectants. Do not squeeze the swollen body to “pop” it out. Do not yank so hard that you tear the dog’s skin. These methods are less predictable than simple mechanical removal and can make the bite site more irritated.
Do not use dog tick preventives on cats unless the product is explicitly labeled for cats. Some canine parasite products are toxic to cats. In mixed households, apply dog products exactly as directed and keep cats away until the application site is dry if the label requires separation.
Aftercare for the Bite Site
A small bump can persist for a few days. That alone is not unusual. Photograph the area if you want a baseline. Check once daily for spreading redness, heat, swelling, discharge, tenderness, or a ring of irritated skin. Prevent licking if the dog is bothering the spot.
Do not start leftover antibiotics, steroid creams, tea tree oil, or human pain relievers. Human medications can be dangerous for dogs, and topical products may be licked. If the site looks infected or your dog seems unwell, your veterinarian can decide whether testing, medication, or monitoring is appropriate.
Building a Tick-Ready Pet First-Aid Kit
A practical kit includes fine-tipped tweezers, a tick hook, disposable gloves, small zip bags, antiseptic wipes labeled for pets, a marker for dating samples, and your veterinarian’s phone number. Keep one kit at home and a smaller version in a hiking or car bag. The best kit is the one you can find quickly while the dog is still.
If you travel, check regional tick risk before the trip. A dog visiting a new state or climate may encounter tick species and diseases that are less common at home. Your veterinarian can help adjust prevention around travel, boarding, hunting, or camping.
Frequently Asked Questions
Can I use rubbing alcohol to make a tick back out?
No. Alcohol is for killing a removed tick or disinfecting tools, not for making an attached tick detach. Mechanical removal with steady pressure is the recommended approach.
Should I twist a tick-removal hook?
Follow the specific tool’s instructions, but the core safety goal is the same: remove the tick without crushing it or tearing the skin. With tweezers, pull straight upward with steady pressure.
Do dogs need antibiotics after every tick bite?
No. Veterinarians decide based on symptoms, tick species, geography, attachment time, testing, and your dog’s risk factors. Do not give leftover antibiotics.
Can ticks live in my house after removal?
Most ticks are picked up outdoors, but some species can survive indoors. Dispose of removed ticks securely, wash bedding if you found many, and talk to your veterinarian or pest professional if you suspect a home infestation.
Related Prevention Tools
Removal is only the emergency step. For ongoing bite prevention, compare veterinarian-guided options in our dog flea and tick prevention guide and keep a dog tick remover tool in your first-aid kit.
Bottom Line
Use fine-tipped tweezers or a tick tool, grip close to the skin, pull steadily, clean the bite, and watch your dog over the next few weeks. Avoid folk remedies. If the tick is in a delicate location, your dog is painful, or illness appears, involve your veterinarian quickly.
What to Watch For After Removal
Most tick bites heal with simple cleaning and observation, but the next several weeks matter. Check the bite site daily for expanding redness, swelling, discharge, pain, or a lump that worsens instead of shrinking. Also watch for fever, unusual tiredness, reduced appetite, shifting-leg lameness, swollen joints, coughing, pale gums, or behavior that seems off for your dog. Those signs do not prove a tick-borne infection, but they are strong reasons to call your veterinarian and mention the recent bite.
Save a clear photo of the tick and the bite location if you can. You do not need to identify the tick perfectly at home, but photos help your veterinary team judge risk by region, season, attachment time, and clinical signs. Do not apply leftover antibiotics, essential oils, or harsh disinfectants to the bite. If your dog is overdue for parasite prevention, use the bite as a prompt to ask about a year-round plan matched to your local tick pressure, travel habits, and household safety needs.
Sources
- Centers for Disease Control and Prevention tick removal guidance.
- AVMA pet-owner resources on ticks, Lyme disease, and parasite prevention.
- Companion Animal Parasite Council guidance on ticks and tick-borne disease risk in dogs.
- Merck Veterinary Manual overview of ticks and tick-borne infections in dogs.
- American Kennel Club Canine Health Foundation educational resources on tick-borne disease signs.