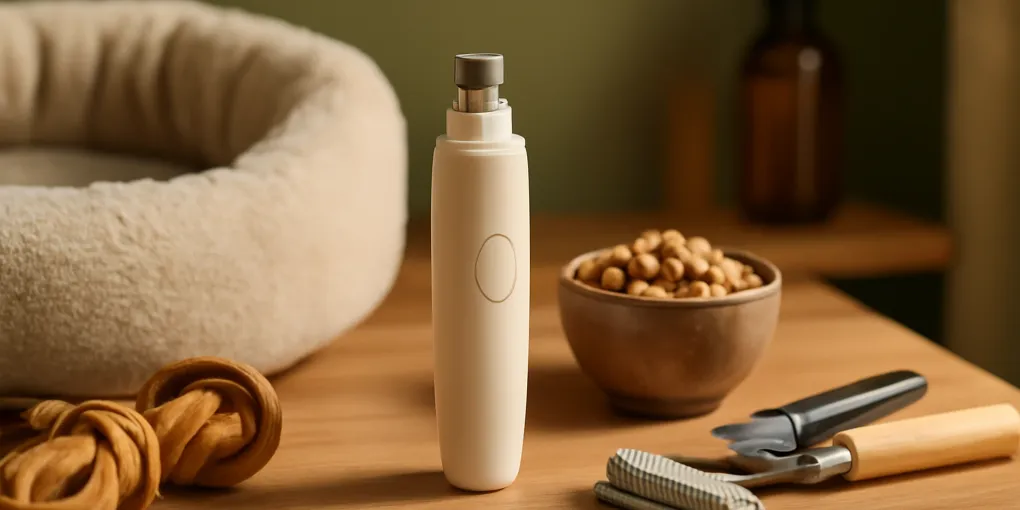
Best Puppy Nail Grinders for Sensitive Dogs: Quiet, Low-Stress Options for 2026
Buyer's GuideCompare quiet puppy grinders
Best fitBest for: | Main at-home option | `quiet puppy nail grinder variable speed` | Motor tone, low-speed setting, small nail ports, rep
Varies
Quick picks
| Product | Key Specs |
|---|---|
| See price on Amazon |
|
| See price on Amazon |
|
| See price on Amazon |
|
Product availability, certifications, and retailer details can change; check the current Amazon page before buying.
Best Puppy Nail Grinders for Sensitive Dogs: Quiet, Low-Stress Options for 2026
The best puppy nail grinder is not simply the most powerful rotary tool in the grooming aisle. For a young dog with soft nails, developing confidence, and a limited attention span, the right grinder is quiet enough to introduce gradually, light enough to hold steady, and slow enough that you can remove tiny amounts of nail without heating the shell or startling the puppy. A sensitive puppy may react to vibration before the grinding drum ever touches a claw, so the buying decision has to include training time, handling comfort, and your own ability to stop before the session becomes too much.
This guide is written for puppy owners who want a safer at-home nail routine but do not want to turn grooming into a wrestling match. It focuses on grinder features that matter for small paws: low noise, variable speed, a small-diameter bit, a usable guard, a shape that keeps hair away from the spinning head, and enough battery life to finish one short session without rushing. It also explains when clippers, a scratchboard, or a groomer visit may be the better choice.
If your puppy is already fearful of paw handling, start with our puppy socialization and handling checklist before you shop. A grinder can smooth sharp tips, but it cannot replace step-by-step cooperative handling. If the nail is cracked, bleeding, swollen at the base, unusually dark and painful, or your puppy limps after a trim, pause the home routine and ask your veterinary team for help.
Quick picks by puppy type
| Puppy situation | Grinder style to prioritize | Why it works | What to avoid |
|---|---|---|---|
| Sound-sensitive toy or small breed | Low-speed rechargeable grinder with a small port guard | The guard helps isolate one nail and the lower motor tone is easier to condition | High-speed hobby tools that jump from off to loud |
| Medium puppy with thick but short nails | Variable-speed grinder with replaceable diamond drum | You can start slow, then briefly increase speed for harder outer nail | Single-speed units that bog down and encourage pressure |
| Long-haired paws | Grinder with a narrow exposed tip and good visibility | Better sight lines reduce the chance of catching coat | Wide open drums used near feathering without trimming hair first |
| Puppy who hates vibration | Scratchboard plus occasional professional trim | The dog controls movement and can build confidence first | Forcing a grinder while the puppy pulls away |
| Owner with shaky hands | Short, lightweight grinder with tactile speed control | Less fatigue makes it easier to hold the paw and tool separately | Heavy plug-in rotary tools with dangling cords |
G6/composite scoring section
Our G6/composite score is a practical decision framework rather than a claim that one grinder is universally best. For puppy nail grinders, the weights are:
| Factor | Weight | How we apply it to puppy nail grinders | What earns a high score |
|---|---|---|---|
| Research | 30% | We favor choices that fit low-stress handling, gradual desensitization, and basic nail anatomy. | The tool supports short sessions, light pressure, and clear stopping points. |
| Evidence Quality | 25% | We separate direct safety principles from brand claims about silence, comfort, or speed. | Claims are modest and tied to observable features like speed range, guard design, and bit type. |
| Value | 20% | We judge whether the grinder will remain useful as the puppy grows. | Replaceable grinding heads, USB charging, durable switches, and no fragile gimmicks. |
| User Signals | 15% | We look at patterns owners commonly report: noise, vibration, charging failures, hair catching, and weak motors. | Consistent comments that the grinder is controllable and easy to introduce slowly. |
| Transparency | 10% | We explain limits, tradeoffs, and when home grooming should stop. | The article is clear about uncertainty and does not turn health or behavior problems into shopping problems. |
A grinder can score well without being expensive. A quiet motor, predictable speed control, and a comfortable grip often matter more than digital displays or a case full of attachments. A puppy tool should make it easy to remove a dusting of nail, reward the dog, and end while the puppy is still relaxed.
What makes a grinder puppy-safe
Noise is the first filter. Many product pages describe a grinder as quiet, but puppies experience sound together with vibration and restraint. A lower-pitched hum is usually easier to work with than a sharp whine. If you can test a grinder in person, turn it on across the room and watch whether your puppy or resident dog startles, freezes, barks, or leaves. If you are buying online, read owner comments for words such as “high pitched,” “rattles,” “vibrates,” or “scares my dog.” Those comments are more useful than a single advertised decibel number measured under unknown conditions.
Speed control is the second filter. Puppies need precision, not aggressive material removal. A low setting lets you touch the nail for one second, reward, and stop. A higher setting can be useful for a larger adolescent dog with thicker nails, but it should not be the default for a first introduction. The grinder should start smoothly instead of lurching. A switch that is too easy to bump can startle both puppy and handler, so a firm slider or recessed button is preferable.
The grinding surface matters too. Diamond drums are common because they stay abrasive longer than disposable sandpaper bands and are easy to wipe clean. Sanding bands can work, but cheap bands may slip or wear unevenly. A small rounded bit is useful for dewclaws and tiny nails, while a wide drum can be clumsy on toy breeds. Whatever bit you choose, let the abrasive do the work. Pressing harder increases heat and vibration, which is exactly what a sensitive dog learns to dislike.
A guard can help new owners line up the nail, but it is not magic. The best guard has ports sized for small and medium nails and still lets you see what you are doing. A bulky opaque cap can hide the nail angle and collect dust. If the guard makes the tool harder to clean or blocks visibility, remove it only if the manufacturer allows that and you can safely control the exposed bit.
How to introduce a nail grinder without panic
Treat the grinder as a training object before it becomes a grooming tool. On day one, place the grinder on the floor with the power off. Let your puppy sniff it, then feed a treat nearby. Pick it up, put it down, and feed again. The goal is not trimming; the goal is teaching that the object predicts calm rewards.
On the next sessions, turn the grinder on in another room or behind your back for one second, then feed. If your puppy startles but recovers quickly, increase distance and reduce duration. If the puppy hides, refuses food, urinates, growls, or mouths your hand, the step was too hard. Go back to the powered-off version. Sensitive dogs do better when the first week feels almost boring.
When the sound is no longer interesting, pair the vibration with touch. Hold the turned-off grinder near the paw, feed, and release. Touch the handle or non-spinning body of the grinder to the shoulder or leg, feed, and release. Later, turn it on and let the body of the tool lightly touch your own hand first, then the puppy’s shoulder, not the nail. This builds a bridge between sound and sensation without the surprise of grinding.
The first nail session should be comically short. Choose one easy front nail, hold the paw gently, touch the grinder to the tip for less than a second, feed, and stop. You do not need to finish a paw. You are building a grooming history. Puppies remember whether handling ends in success or conflict.
Step-by-step trimming routine
Set up in a bright room with non-slip footing. A yoga mat, grooming mat, or towel over a low table can help, but floor work is safer for wiggly puppies. Keep treats ready before the grinder turns on. If you need a second person, their job is to feed and observe body language, not to pin the puppy down.
Look at the nail before grinding. In light nails, the quick appears as the pink inner tissue. In dark nails, watch the underside and remove tiny layers until the cut surface begins to show a softer central dot; stop before you reach a sensitive area. Grinders are forgiving because they remove nail slowly, but they can still hit the quick if you keep going.
Hold the paw close to the toe you are working on. Stabilizing one toe reduces vibration traveling through the whole foot. Touch the grinder to the nail tip at a shallow angle and use one- or two-second contacts. Rotate around the sharp edge rather than grinding straight toward the quick. After each contact, check heat with your finger. If the nail feels warm, stop that nail and move to another day.
Do front dewclaws separately. They often curve and may not wear down during walks. A small port or narrow bit gives better control. For very small puppies, even a dewclaw touch may be enough for one session.
End with an easy win. Ask for a sit, scatter a few treats, or play a gentle game. Put the grinder away before the puppy is frantic. A routine that removes less nail but keeps trust intact is better than a perfect shape achieved through fear.
Grinder vs clippers vs scratchboard
Clippers are fast and quiet, but they create pressure on the nail before the cut. Some puppies tolerate that pressure better than grinder vibration; others hate the sudden snap. Guillotine-style clippers can be awkward on tiny puppy nails, while scissor-style clippers give many owners better visibility. If you use clippers, trim only the hook or sharp tip, then smooth with one brief grinder touch if your puppy accepts it.
A grinder is best when you want rounded edges, gradual shortening, or better control on dark nails. It is also helpful for puppies that scratch people during play but do not need a major trim. The downside is training time. The motor changes the emotional picture, and skipping the introduction can create long-term resistance.
A scratchboard is a valuable alternative for dogs that panic during paw restraint. Tape medium-grit sandpaper to a sturdy board, teach the puppy to paw at it, and reward. Scratchboards usually work best for front nails and may not address dewclaws or rear nails. They are still useful because they let the dog participate instead of only being handled.
Many households use a hybrid plan: scratchboard twice a week, clippers for tiny tips, and a grinder for smoothing. The right plan is the one your puppy can repeat calmly.
Buying details that matter
Choose a grinder with at least two speeds and a clearly stated charging method. USB-C is convenient, but any reliable cable is fine if replacements are easy to find. Check whether the grinder runs while plugged in; some rechargeable units do not. For safety, do not use a grinder with a damaged cord, cracked case, loose head, or battery that heats during charging.
A small, balanced body is easier to control than a large tool marketed for every pet size. If the grinder is too wide for your hand, you will compensate by moving the paw more, which increases puppy frustration. Rubberized grips can help, but they should not collect nail dust in deep grooves.
Replacement heads are worth checking before purchase. If the bit is proprietary and hard to find, the grinder may become disposable. A worn bit forces longer contact time and more pressure. That is poor value even if the original price was low.
Do not overpay for lights unless they are genuinely positioned to illuminate the nail tip. A small LED can help with dark nails, but it can also create glare or cast shadows under a guard. Visibility from your room lighting is usually more important.
Practical shopping shortlist
Use these searches to compare current models, seller information, return windows, and replacement parts. Prefer listings with clear photos of the guard, bit, charging port, and included accessories.
| Check price | Need | Search phrase | What to compare |
|---|---|---|---|
| Search Amazon for Compare quiet puppy grinders | Main at-home option | quiet puppy nail grinder variable speed | Motor tone, low-speed setting, small nail ports, replaceable diamond bit |
| Search Amazon for Compare small-dog low-vibration grinders | Tiny puppy or toy breed | small dog nail grinder low vibration | Narrow head, light body, guard opening size, owner comments from small-breed homes |
| Search Amazon for Compare two-speed diamond-bit grinders | Thick adolescent nails | dog nail grinder two speed diamond bit | Torque at low speed, heat control, availability of replacement heads |
| Search Amazon for Compare dog scratchboards | Training alternative | dog scratchboard nail file | Board stability, grit replacement, size for front-paw use |
| Search Amazon for Compare small puppy nail clippers | Backup trimming tool | small puppy nail clippers safety guard | Blade visibility, handle control, suitability for small claws |
Before buying, confirm that the current listing matches the model in the photos, that the seller accepts returns, and that the instructions explain cleaning and bit replacement. Choose the quietest, smallest tool that still has enough torque for your puppy’s nails.
Maintenance and hygiene
After each session, turn the grinder off, remove loose nail dust with a small brush, and wipe the exterior with a dry or slightly damp cloth according to the manufacturer’s directions. Do not soak the motor housing. Nail dust can build up under guards and around the bit, making the tool louder and less efficient.
Inspect the grinding head every few sessions. Replace it when the surface looks smooth, uneven, rusty, or clogged beyond cleaning. A fresh abrasive surface lets you use lighter contact, which is kinder to the puppy and safer for the nail.
Store the grinder where your puppy cannot chew the cord or bit. Recharge it before the battery is completely dead if the manual recommends that. A weak battery may slow the drum and tempt you to press harder. Keep styptic powder available for nail work, but do not let its presence encourage risky trimming. Prevention is better than stopping a bleed.
Red flags during nail sessions
Stop immediately if your puppy repeatedly pulls the paw away, tucks the tail, pants when the room is cool, refuses familiar treats, growls, snaps, trembles, or becomes frantic when the grinder appears. These are not signs of stubbornness; they are information that the plan is moving too fast.
Stop for medical reasons if you see bleeding, a split nail, swelling at the nail bed, discharge, a foul smell, sudden sensitivity in one toe, or limping. Puppies can injure nails during play, and grinding over a painful nail can make the problem worse. Dogs with known orthopedic pain, skin infections between the toes, or previous traumatic trims may need a veterinary or professional grooming plan.
Also stop if the nail or bit becomes hot. Heat can build quickly with continuous contact, especially on small nails. Use brief touches, move from nail to nail, and give the tool time to cool if needed.
Common mistakes
The most common mistake is trying to finish all four paws because the grinder is already out. Puppies learn from the whole experience, not just the final nail length. One calm nail today is a better investment than sixteen rushed nails followed by avoidance next week.
The second mistake is using the guard as permission to stop looking. The quick still matters, and dark nails still require slow progress. Watch the shape of the nail, the puppy’s body language, and the dust pattern.
The third mistake is grinding freshly wet nails after a bath. Dry nails give better feedback and create less clogging. If bath day and nail day must be the same, dry the paws thoroughly and keep the session short.
The fourth mistake is trimming hair near the paw with the grinder running. Long coat can wrap around a spinning head. If your puppy has feathering or fluffy feet, tidy the hair with appropriate grooming scissors or ask a groomer before grinding.
Bottom line
For sensitive dogs, the best puppy nail grinder is a quiet, controllable tool that fits a patient training plan. Look for low vibration, variable speed, a small usable head, replaceable abrasive parts, and a shape you can hold steady. Skip tools that are loud, oversized, hard to clean, or marketed as instant solutions for anxious puppies.
Plan on several short introductions before the first real trim. Keep sessions brief, reward generously, and stop before your puppy needs to escape. If you can maintain that rhythm, a grinder can turn sharp puppy claws into manageable rounded tips without sacrificing trust.
Sources and evidence notes
- American Veterinary Medical Association pet care resources: https://www.avma.org/resources-tools/pet-owners/petcare
- Merck Veterinary Manual overview of canine nail and paw health topics: https://www.merckvetmanual.com/
- Fear Free Pets handling and cooperative-care education: https://www.fearfreehappyhomes.com/
- American Animal Hospital Association preventive care and life-stage guidance: https://www.aaha.org/
- ASPCA dog grooming and handling resources: https://www.aspca.org/pet-care/dog-care
FAQ
What is the best puppy nail grinder for a very nervous dog?
Choose a lightweight, low-vibration grinder with variable speed and a small nail port. The exact brand matters less than whether the tool can be introduced at a distance, run briefly at a low setting, and touch one nail without pressure. For a puppy who panics at the sound, start with powered-off handling or use a scratchboard while you rebuild confidence.
Are nail grinders safer than clippers for puppies?
They can be safer for gradual shaping because they remove tiny amounts of nail at a time, but they are not automatically safer. A grinder can still reach the quick, heat the nail, catch hair, or frighten a puppy. Clippers may be better for dogs who dislike vibration. Many owners use clippers for the tip and a grinder for smoothing.
How often should I grind puppy nails?
Most puppies do well with brief checks once a week. You may only need to touch a few nails each time. The goal is to prevent long hooks and keep handling familiar, not to perform a major trim every session. Fast-growing nails, dewclaws, and puppies that walk mostly on soft surfaces may need more frequent attention.
How do I know when to stop grinding a dark nail?
Remove very small layers and watch the cut surface. As you approach sensitive tissue, the center of the nail often looks softer or darker than the outer shell. Stop before you are unsure. If your puppy reacts sharply to a light touch on one nail, end that nail and reassess later.
Can I use a human rotary tool on puppy nails?
A full-size hobby rotary tool is usually too loud, fast, and bulky for a young or sensitive puppy unless the handler is experienced and the tool has excellent low-speed control. A pet-specific grinder is generally easier for short, low-stress sessions because it is smaller and often includes guards or ports.
What should I do if I accidentally quick the nail?
Stay calm, apply styptic powder or another veterinary-approved clotting aid, and keep the puppy quiet while the bleeding stops. Do not continue grinding that day. If bleeding does not stop promptly, the nail is torn, or your puppy seems painful afterward, contact your veterinary team.