Aquarium Net Disinfection: A No-Cross-Contamination Protocol
ProtocolQuick picks
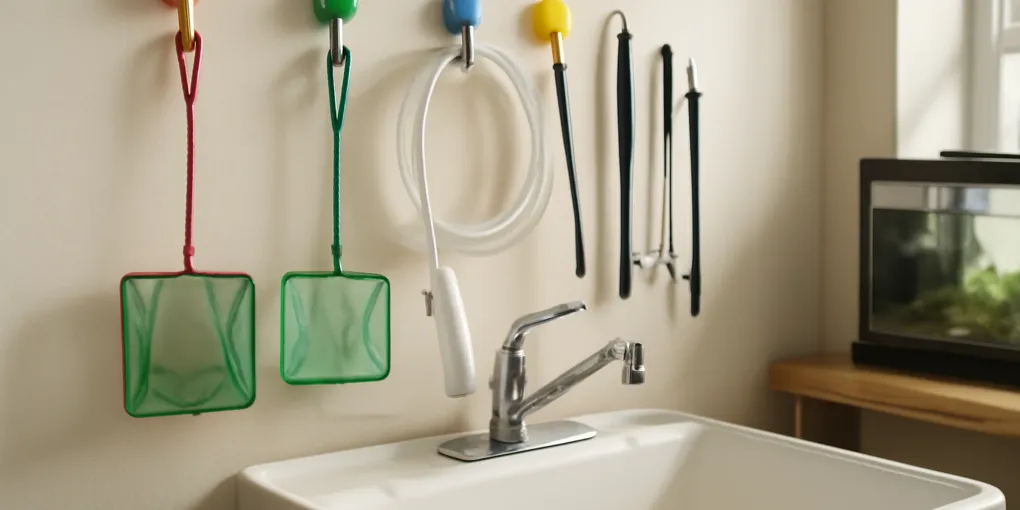
Color-coded aquarium net set
★ Top pick Best prevention tool- Note: Assign one color to each system and choose smooth sealed handles with mesh that can be fully cleaned and dried.
Graduated utility bucket with lid
Best for measured solutions- Note: Keep it aquarium-only. Volume markings help produce the concentration specified on an aquatic-veterinary disinfectant label.
Aquarium siphon with removable hose
Best easy-clean design- Note: Prefer smooth tubing and separable fittings that can be flushed, inspected, and hung open to drain.
Aquarium net disinfection starts with separation: give each display, quarantine, and hospital system its own net, siphon, bucket, algae pad, towel, feeding tools, and water-test container. When equipment must move between systems, remove debris first, apply a validated disinfectant for its full labeled contact time, rinse or neutralize as directed, and dry every surface completely.
The safest tool is the one that never crosses systems
Cleaning and disinfection are different. Cleaning removes slime, feces, food, and other organic material. Disinfection applies a validated chemical or physical process to a cleaned surface for a specified concentration and contact time. A quick dip in an unknown solution is neither.
This protocol is for routine household aquarium biosecurity. When fish have unexplained deaths, ulcers, neurologic signs, persistent wasting, or a confirmed pathogen, ask an aquatic veterinarian for a pathogen-specific plan. Some organisms resist common disinfectants, and some fish pathogens can infect people through broken skin.
Quick picks for separate aquarium tools
- Check Color Coded Aquarium Fish Net Set on Amazon for one visibly distinct net per system.
- Check Graduated Utility Bucket With Lid on Amazon for an aquarium-only vessel with measured volume marks.
- Check Aquarium Siphon Removable Hose on Amazon for smooth tubing that separates and hangs open to dry.
Reject wooden handles, cracked plastic, dense foam, and fittings that trap water. Porous or damaged equipment is difficult to clean predictably and may be cheaper to discard after a disease incident.
Build three equipment zones
Label storage for display, quarantine, and hospital tools. Quarantine and hospital are not interchangeable: a healthy new arrival should not share wet equipment with a fish receiving treatment.
If you maintain several displays, assign each a number and matching tape color. Put the mark on both ends of a siphon hose, on the bucket handle, and on the net handle. Store nets hanging rather than piled in one wet bin.
Work in this order:
- healthiest established display;
- newer or higher-risk display;
- quarantine;
- hospital or visibly affected system.
Wash hands and forearms between systems and cover cuts with waterproof gloves. Do not carry a wet towel, test vial, or phone contaminated by aquarium water back to the healthy tank.
Step 1: remove visible debris immediately
Rinse or flush tools before slime and waste dry. Remove hair, plant fragments, gravel, and food from net seams and siphon fittings. Disassemble removable valves and squeeze bulbs according to the manufacturer instructions.
Organic material can shield microbes and consume disinfectant. That means a dirty net left soaking in stronger chemical is not a shortcut. Scrub with an aquarium-only brush where the material permits it, then rinse away loosened material.
Do not clean at a food-preparation sink. Prevent splashes onto toothbrushes, dishes, and human wound-care supplies.
Step 2: decide whether routine cleaning or disinfection is required
Dedicated equipment used only in one healthy stable aquarium can often be cleaned, rinsed, and completely dried after routine maintenance. Disinfection is prudent when equipment contacted:
- quarantine or hospital water;
- a fish with suspected infectious disease;
- an aquarium with unexplained illness or death;
- water from a seller, pond, or another household;
- a system before reassignment to a different tank.
Do not use disinfection as permission to share tools casually. Chemical residue and incomplete contact time add new risks.
Step 3: choose one validated disinfectant protocol
The product label and aquatic-veterinary instructions control concentration, contact time, temperature, material compatibility, personal protective equipment, and disposal. More concentrated is not automatically more effective and can damage mesh, rubber, metal, and lungs.
Common protocols may use sodium hypochlorite, accelerated hydrogen peroxide, Virkon Aquatic, or other aquaculture disinfectants. These are not interchangeable. Never combine bleach with acids, ammonia, vinegar, peroxide, or another cleaner. Mixing chemicals can release toxic gas.
Measure actual water volume in a graduated aquarium-only bucket. Check Graduated Utility Bucket With Lid on Amazon. Add product exactly as its current label directs. Record preparation time and discard the solution on its label schedule; an old open bucket is not a known concentration.
Step 4: wet every surface for the full contact time
Start timing only after the cleaned tool is fully wet. Open net folds, fill siphon tubing, rotate valves, and eliminate air pockets. A hose exterior submerged in solution is not disinfected inside unless solution contacts the full lumen.
Use a timer. Do not estimate a ten-minute contact time while doing another tank. Keep the container covered or controlled so children, pets, and birds cannot access fumes or liquid.
| Tool | Hidden area to address | Drying position |
|---|---|---|
| Net | Mesh-to-frame seam and handle socket | Hanging with mesh open |
| Siphon | Tube lumen, squeeze bulb, valve seats | Disassembled, both ends open |
| Bucket | Handle mounts, rim, pouring lip | Inverted on a clean rack |
| Algae scraper | Blade holder and telescoping joints | Separated if possible |
| Feeding pipette | Interior bulb and narrow tip | Tip down, bulb detached |
Step 5: rinse, neutralize, and dry as directed
Follow the disinfectant label for rinsing and any required neutralization. “Aquarium water will dilute it” is not a residue-control plan. If the protocol uses chlorine, verify the required dechlorination and rinse steps rather than relying on odor.
Drying must expose the entire surface to moving air. Hang hoses with no low loop that holds water. Spread net mesh. Do not return damp tools to a sealed tote.
Drying is helpful but not universally lethal to every pathogen. It completes the selected protocol; it does not replace the right disinfectant when one is required.
Step 6: store clean tools without recontamination
Move dried tools to the labeled clean zone. Do not let a hospital bucket sit above clean nets where it can drip. Store disinfectant measuring cups with the chemical, not with fish-food scoops.
Keep a small log for quarantine and hospital tools:
- tank identifier;
- date and reason for disinfection;
- product and lot or expiry date;
- prepared concentration;
- contact time;
- rinse or neutralization step;
- person completing the process.
This record matters if illness appears in another tank and you need to reconstruct equipment movement.
Items to discard instead of disinfect
Discard cracked buckets, frayed net seams, scratched porous airline, crumbling sponge, wood, and single-use filter floss after infectious exposure unless a veterinarian gives another protocol. Do not return quarantine filter media to a display aquarium.
A removable smooth-hose aquarium siphon is worth choosing because every wet surface can be reached. Check Aquarium Siphon Removable Hose on Amazon. A complex pump with a sealed contaminated cavity may be unsuitable for reassignment.
Routine checklist after every water change
- Confirm the tool color matches the tank.
- Keep bucket and siphon ends off the floor.
- Remove debris before it dries.
- Clean from healthy systems toward high-risk systems.
- Disinfect only with a measured, documented protocol when indicated.
- Rinse or neutralize exactly as directed.
- Hang every surface open until completely dry.
- Store in the correct labeled zone.
Siphon lumens must fill without air pockets during contact time, and wet net seams must dry open rather than compressed in a shared bin. A surface-only dip or quick rinse misses both contamination points.
Sources
- University of Florida IFAS Extension, Sanitation Practices for Aquaculture Facilities: https://edis.ifas.ufl.edu/publication/FA099
- Merck Veterinary Manual, Management of Aquarium Fish: https://www.merckvetmanual.com/exotic-and-laboratory-animals/aquarium-fish/management-of-aquarium-fish
- Virkon Aquatic, current product page and instructions: https://www.syndel.com/product/virkon-aquatic/
Frequently Asked Questions
- Rinsing removes debris but is not reliable disinfection. The correct process depends on the pathogen risk, net material, disinfectant label, contact time, rinsing, and drying.
- Dedicated siphons are safer. If equipment must be shared, use a written clean-disinfect-rinse-dry protocol between systems and never move directly from a sick tank to a healthy one.
- Sodium hypochlorite can be effective in an appropriate protocol, but concentration, organic debris, contact time, material compatibility, neutralization, rinsing, and drying all matter. Get aquatic-veterinary guidance for disease incidents and never mix bleach with other chemicals.